You are not logged in.
- Topics: Active | Unanswered
Announcement
#26 2025-09-01 13:36:41
- Calliban
- Member
- From: Northern England, UK
- Registered: 2019-08-18
- Posts: 4,305
Re: Misc. Home Projects
I have attached the rope drive to both pulleys. The machine is now fully finished. I will put some additional pictures on tomorrow. Unfortunately, adding the rope has added a lot of friction to the device. I don't think it will work that well until the trees are gone.
"Plan and prepare for every possibility, and you will never act. It is nobler to have courage as we stumble into half the things we fear than to analyse every possible obstacle and begin nothing. Great things are achieved by embracing great dangers."
Offline
Like button can go here
#27 2025-09-02 03:53:52
- Calliban
- Member
- From: Northern England, UK
- Registered: 2019-08-18
- Posts: 4,305
Re: Misc. Home Projects
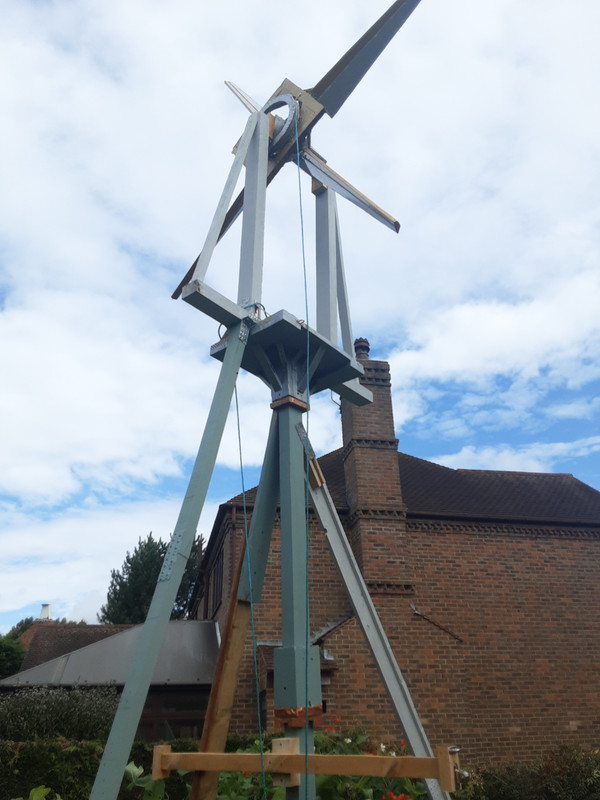
The completed machine with rope drive attached.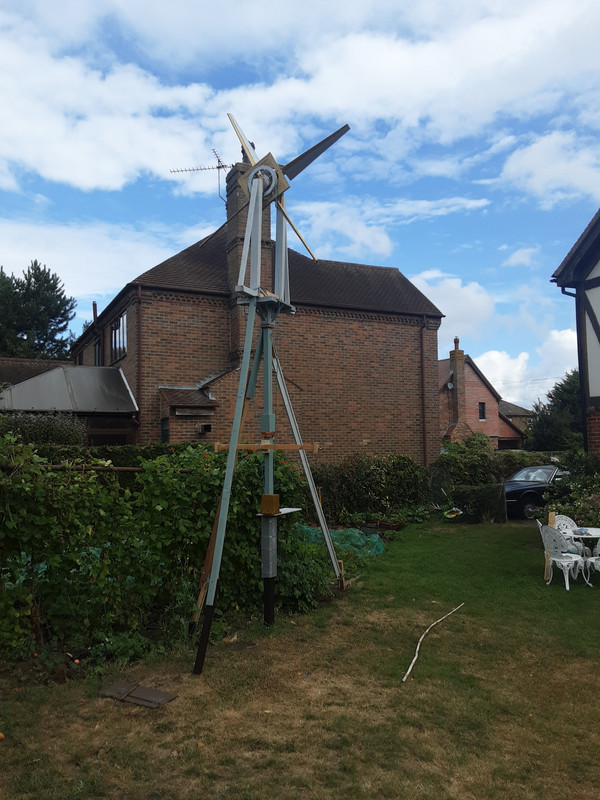
Last edited by Calliban (2025-09-02 03:56:44)
"Plan and prepare for every possibility, and you will never act. It is nobler to have courage as we stumble into half the things we fear than to analyse every possible obstacle and begin nothing. Great things are achieved by embracing great dangers."
Offline
Like button can go here
#28 2025-09-02 08:14:35
- Calliban
- Member
- From: Northern England, UK
- Registered: 2019-08-18
- Posts: 4,305
Re: Misc. Home Projects
For Calliban re completed machine! https://newmars.com/forums/viewtopic.ph … 41#p234041
Congratulations on carrying this project from start to finish, and for sharing your vision and progress with this community, and with the larger readership of the forum we cannot measure but hope exists.
A detail that might of of interest to those who work a bit with rope, is how you achieved the splice to pass smoothly over the pulleys. The traditional method of intertwined lines takes some time, but the long splice can pass through a pulley.
Here is a YouTube video Google found, showing the construction of a long splice. Mark the braider shows how to use a special tool designed for the purpose. https://www.youtube.com/watch?v=0QA5NW6SQOk
The video is for our readers, of course, with the thought you might have done something similar.
(th)
The rope I used was 6mm polypropylene. I joined the two ends by melting them together and then compressing the joint with pliers to get it the same diameter as the rope. I kept melting and compressing until I was satisfied that the two ends were fully bonded. The result looks a bit messy, but is strong enough for what I need and doesn't seem to have problems with the pulley.
Polypropylene is strong and cheap; I was able to buy 30m for just a few $ on amazon. The only problem is that it has low surface energy and cannot be glued. It is also difficult to tie to itself. But it melts at 120°C which is achievable with a lighter.
Last edited by Calliban (2025-09-02 08:17:44)
"Plan and prepare for every possibility, and you will never act. It is nobler to have courage as we stumble into half the things we fear than to analyse every possible obstacle and begin nothing. Great things are achieved by embracing great dangers."
Offline
Like button can go here
#29 2025-09-02 13:59:58
- Calliban
- Member
- From: Northern England, UK
- Registered: 2019-08-18
- Posts: 4,305
Re: Misc. Home Projects
For Calliban re rope fusion join ... https://newmars.com/forums/viewtopic.ph … 47#p234047
Congratulations on making that work!
I noticed the rope looked as though it might have plastic material... That should handle moisture well. However, I didn't think of heat binding and appreciate your telling us of your success with that method.
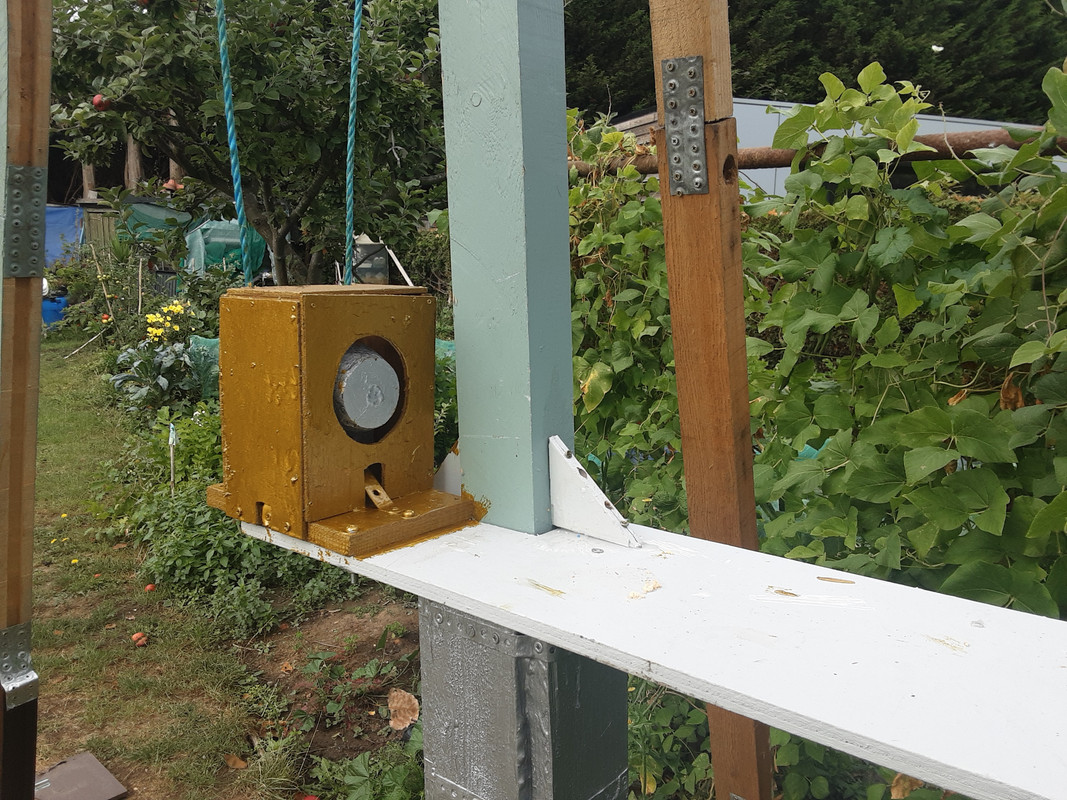
If you'll indulge a further inquiry ... are you planning to put rollers where the rope appears to rub against the platform at the top of the tower, under the mill?
(th)
I had bought some rollers from Temu. However, when I fitted them to the table where the rope is seen to rub, they produced a lot of noise and friction in operation. Oil and grease didn't seem to help, so I removed them. This evening, I installed some brass rollers from an old set of windows that my father had dismantled. These are about 100 years old, but work better than the Chinese imports made in 2025.
I also took your advice and added an idler wheel, as the rope was too loose to grip the pulley under a strong wind. Tomorrow the forecast for my location shows a 20mph westerly wind. This shoukd be sufficient to power the windmill even with the trees attenuating the wind. Once the trees are gone, the wind should be sufficient to drive the machine most days. I could add another set of blades to the rotor to increase the torque generated in a given wind. But I would rather not, as weight is already significant and adding blades is a lot of work.
Last edited by Calliban (2025-09-02 14:01:54)
"Plan and prepare for every possibility, and you will never act. It is nobler to have courage as we stumble into half the things we fear than to analyse every possible obstacle and begin nothing. Great things are achieved by embracing great dangers."
Offline
Like button can go here
#30 2025-09-03 05:38:15
- Calliban
- Member
- From: Northern England, UK
- Registered: 2019-08-18
- Posts: 4,305
Re: Misc. Home Projects
Last night we had a storm that damaged the windmill. It actually ripped one of the spindles out of the nacelle. Of the many ways that this machine could fail, this was one that I never expected. I need to bring the rotor down to repair it. That means putting scaffold back up. Doh!
"Plan and prepare for every possibility, and you will never act. It is nobler to have courage as we stumble into half the things we fear than to analyse every possible obstacle and begin nothing. Great things are achieved by embracing great dangers."
Offline
Like button can go here
#31 2025-09-03 16:25:02
- SpaceNut
- Administrator
- From: New Hampshire
- Registered: 2004-07-22
- Posts: 30,736
Re: Misc. Home Projects
saddened to hear your hard work has broken due to mother nature...
Offline
Like button can go here
#32 2025-09-04 01:46:52
- Calliban
- Member
- From: Northern England, UK
- Registered: 2019-08-18
- Posts: 4,305
Re: Misc. Home Projects
saddened to hear your hard work has broken due to mother nature...
It is a setback, but not a disaster. This afternoon I will put scaffolding up around the tower and bring the rotor down. Now that the rotor is able to transmit power via the rope drive, I no longer need the compartment in the nacelle. So I intend to run a threaded rod all the way through it. I also intend to bolt the bearings onto the rod, as epoxy resin isn't strong enough. I am considering adding some additional blades to the rotor in order to increase the torque. But I am away for work for quite a while now, so that may need to wait until around Christmas time.
"Plan and prepare for every possibility, and you will never act. It is nobler to have courage as we stumble into half the things we fear than to analyse every possible obstacle and begin nothing. Great things are achieved by embracing great dangers."
Offline
Like button can go here
#33 2025-09-04 15:25:28
- Calliban
- Member
- From: Northern England, UK
- Registered: 2019-08-18
- Posts: 4,305
Re: Misc. Home Projects
The rotor is safely back on the ground. I am going to begin upgrades tomorrow after work.
"Plan and prepare for every possibility, and you will never act. It is nobler to have courage as we stumble into half the things we fear than to analyse every possible obstacle and begin nothing. Great things are achieved by embracing great dangers."
Offline
Like button can go here
#34 2025-09-06 06:37:29
- Calliban
- Member
- From: Northern England, UK
- Registered: 2019-08-18
- Posts: 4,305
Re: Misc. Home Projects
I have just finished modifying the rotor. I have put a 10mm stainless thread all of the way through it. Now that I have fitted the rope drive, I no longer need the compartment within the nacelle. I have glued the thread into the holes using epoxy and bolted it both inside the compartment and out. The bearings are now bolted onto the thread on both sides using slim nuts.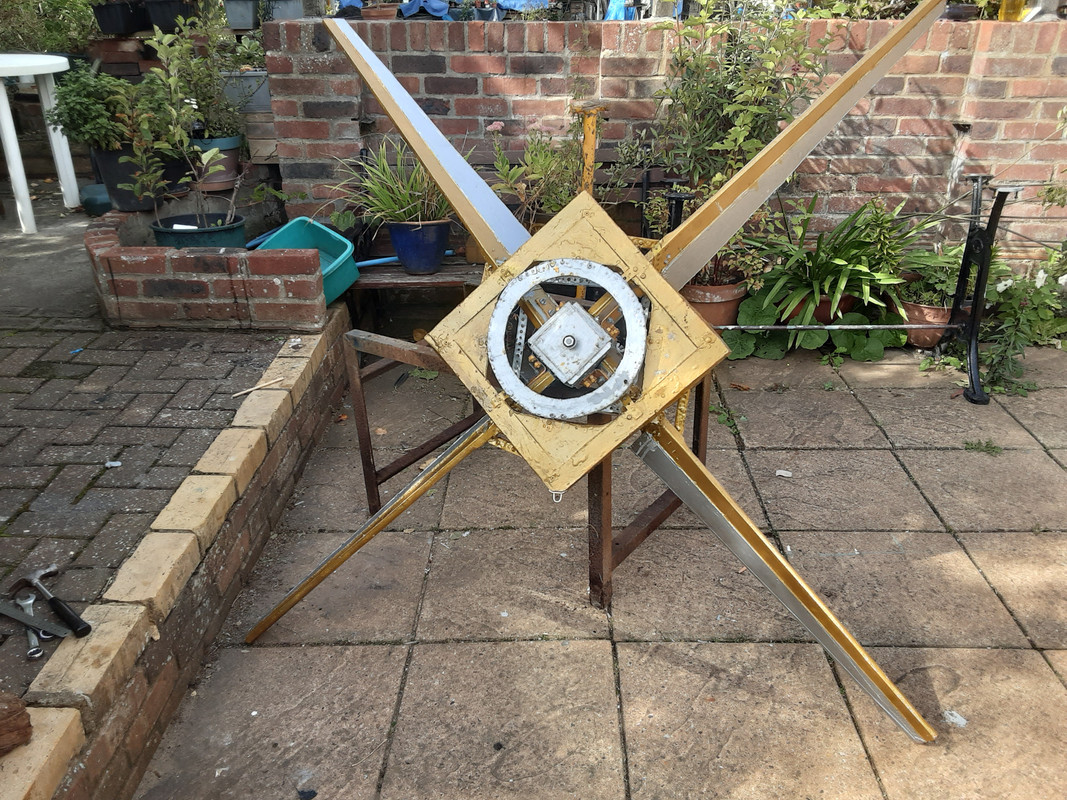
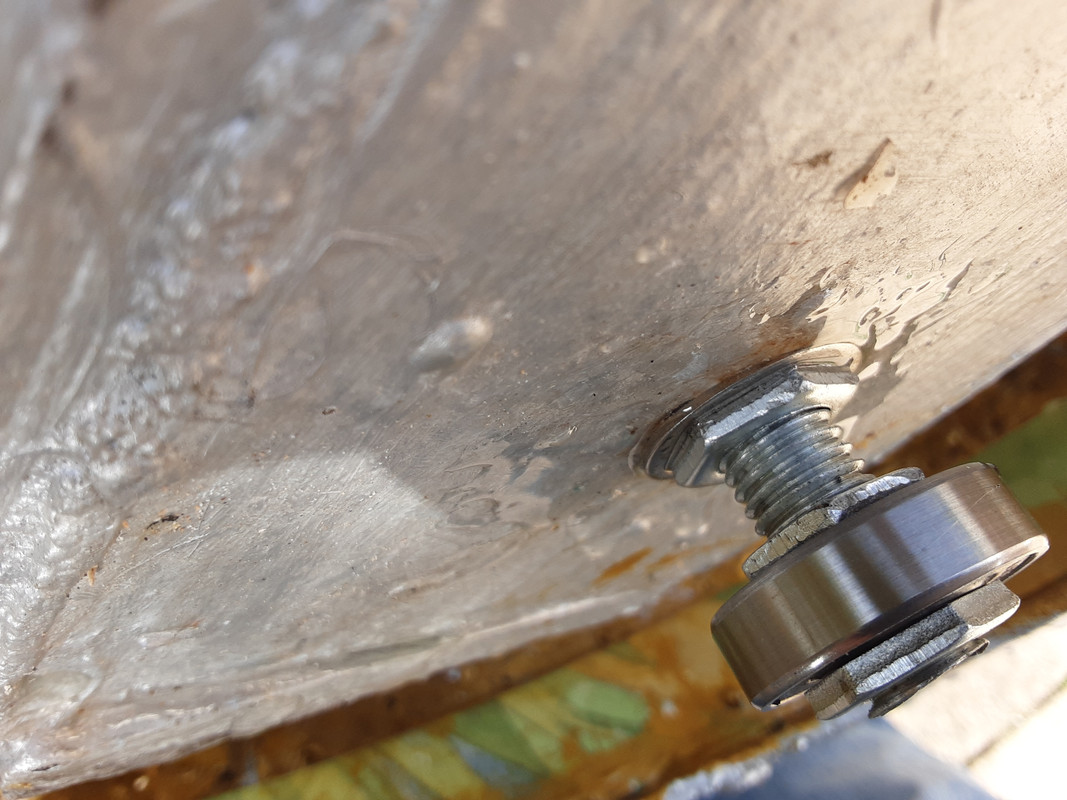
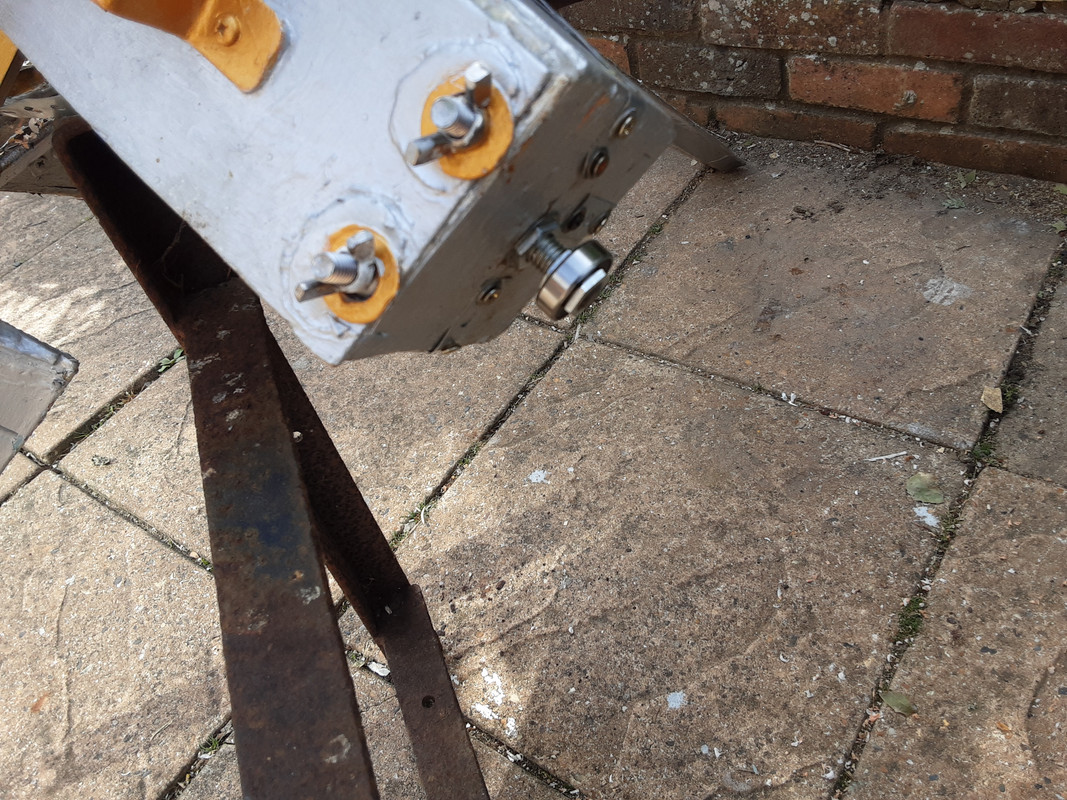
Slim nuts seem to have a problem with jamming on the thread. I had to use a lot of oil to get them on. They are also vulnerable to over-torquing, as I discovered. But the rotor shouod be strong enough now to take whatever punishment mother nature throws at it. Before I put it back on the tower, I intend to add some additional blades.
This will likely be the last post I issue on this topic for a couple of months, as I am away from home for work for a while.
Last edited by Calliban (2025-09-06 06:54:43)
"Plan and prepare for every possibility, and you will never act. It is nobler to have courage as we stumble into half the things we fear than to analyse every possible obstacle and begin nothing. Great things are achieved by embracing great dangers."
Offline
Like button can go here
#35 2025-11-16 13:01:37
- Calliban
- Member
- From: Northern England, UK
- Registered: 2019-08-18
- Posts: 4,305
Re: Misc. Home Projects
I will be resuming work on my windmill on Tuesday. I am hoping to have it finished and up and running a week today. Making tools will take a while longer.
"Plan and prepare for every possibility, and you will never act. It is nobler to have courage as we stumble into half the things we fear than to analyse every possible obstacle and begin nothing. Great things are achieved by embracing great dangers."
Offline
Like button can go here
#36 2025-11-16 17:32:33
- SpaceNut
- Administrator
- From: New Hampshire
- Registered: 2004-07-22
- Posts: 30,736
Re: Misc. Home Projects
I had to put a tarp over my roof to save it from having rain coming through it into the house. It has been lifting several 2x6 8 ft planks from the surface into the air. I am thinking of the types of use of the windmills for the particular use of it.
Offline
Like button can go here
#37 2025-11-23 03:44:33
- Calliban
- Member
- From: Northern England, UK
- Registered: 2019-08-18
- Posts: 4,305
Re: Misc. Home Projects
I have started work on the windmill again. Yesterday, I built four new blades. Today I paint them.
I have saved quite a lot of cost and weight this time. The blades are made from pine wood, 3mm ultrathin plywood and aluminium from recycled drink cans. This is very thin ~0.1mm guage. As before, everything is glued together with epoxy resin. I will post pictures in due course.
"Plan and prepare for every possibility, and you will never act. It is nobler to have courage as we stumble into half the things we fear than to analyse every possible obstacle and begin nothing. Great things are achieved by embracing great dangers."
Offline
Like button can go here
#38 2025-11-30 05:22:29
- Calliban
- Member
- From: Northern England, UK
- Registered: 2019-08-18
- Posts: 4,305
Re: Misc. Home Projects
I have added four new blades to the rotor of my machine and made some improvements to the pulley.
When the paint is dry, the rotor can be installed. I will be putting up the scaffold today.
"Plan and prepare for every possibility, and you will never act. It is nobler to have courage as we stumble into half the things we fear than to analyse every possible obstacle and begin nothing. Great things are achieved by embracing great dangers."
Offline
Like button can go here
#39 2025-11-30 07:51:48
- Calliban
- Member
- From: Northern England, UK
- Registered: 2019-08-18
- Posts: 4,305
Re: Misc. Home Projects
Some additional pictures. The rotor is quite heavy now, in spite of my efforts to reduce the weight of the new blades.


"Plan and prepare for every possibility, and you will never act. It is nobler to have courage as we stumble into half the things we fear than to analyse every possible obstacle and begin nothing. Great things are achieved by embracing great dangers."
Offline
Like button can go here
#40 2025-11-30 16:02:27
- kbd512
- Administrator
- Registered: 2015-01-02
- Posts: 8,526
Re: Misc. Home Projects
Calliban,
Irrespective of how light or heavy the completed rotor assembly happens to be, it's going to work better when balanced.
Have you already done that already, or is it on your "to do" list?
Offline
Like button can go here
#41 2025-12-01 08:29:39
- Calliban
- Member
- From: Northern England, UK
- Registered: 2019-08-18
- Posts: 4,305
Re: Misc. Home Projects
Calliban,
Irrespective of how light or heavy the completed rotor assembly happens to be, it's going to work better when balanced.
Have you already done that already, or is it on your "to do" list?
It is on the to do list. I know the rotor is out of balance because one of the blades is slightly out of alignment from when I dropped the rotor whilst trying to install it. When it is mounted on its bearings, I will be able to trim it by adding steel strip to the blades. I doubt that I can fix the problem entirely.
The weather is poor at present. It is raining with a 40mph gale. The scaffold is up, but I wont be able to install the rotor before tomorrow at the soonest.
After work today, I am going to start work on a table saw. This will be a cubic wooden box with internal dimensions 12", sufficient for a 10" diameter circular saw blade. I can use this to saw firewood. The thing that is taking time is safety features. The saw will carry the female part of the cone clutch. The saw box will be mounted on rails and will be pushed against a spring until the two parts of the the clutch fit together. A peg is then inserted, holding the saw box in place against the compression spring. To seperate the two parts of the clutch, the peg can be pulled out, and the compression spring pushes the two parts of the clutch apart. It will take me at least a few days to build this. But it will be the first tool that I build for the machine. It is therefore a proof of concept.
Last edited by Calliban (2025-12-01 08:32:19)
"Plan and prepare for every possibility, and you will never act. It is nobler to have courage as we stumble into half the things we fear than to analyse every possible obstacle and begin nothing. Great things are achieved by embracing great dangers."
Offline
Like button can go here
#42 2025-12-01 10:24:03
- GW Johnson
- Member
- From: McGregor, Texas USA
- Registered: 2011-12-04
- Posts: 6,205
- Website
Re: Misc. Home Projects
Balancing the rotor:
You seem to have put an all-thread through the centerline of the hub. Try static balancing it upon a level table, while sitting atop that all-thread. I have a car tire balancer that works the same way, with a bubble level. Static balancing a car tire works up to about 70 mph (110 kph) driving speeds just fine. You need dynamic balancing to go faster, though. There's basically an rpm limit to what you can achieve with static balancing.
GW
GW Johnson
McGregor, Texas
"There is nothing as expensive as a dead crew, especially one dead from a bad management decision"
Offline
Like button can go here
#43 2025-12-01 16:30:35
- Calliban
- Member
- From: Northern England, UK
- Registered: 2019-08-18
- Posts: 4,305
Re: Misc. Home Projects
GW, thanks for this. I am going to attempt static balancing on the ground before lifting the rotor up the tower. I don't know if static balancing will be sufficient, and I am not exactly skilled in performing it. But I cannot imagine tip speed being as great as a car tire at 70mph. I will report here how things progress.
"Plan and prepare for every possibility, and you will never act. It is nobler to have courage as we stumble into half the things we fear than to analyse every possible obstacle and begin nothing. Great things are achieved by embracing great dangers."
Offline
Like button can go here
#44 2025-12-02 10:04:19
- Calliban
- Member
- From: Northern England, UK
- Registered: 2019-08-18
- Posts: 4,305
Re: Misc. Home Projects
I have lifted the rotor onto the tower. The bearings are not in the cradles yet, but it is tied to the frame.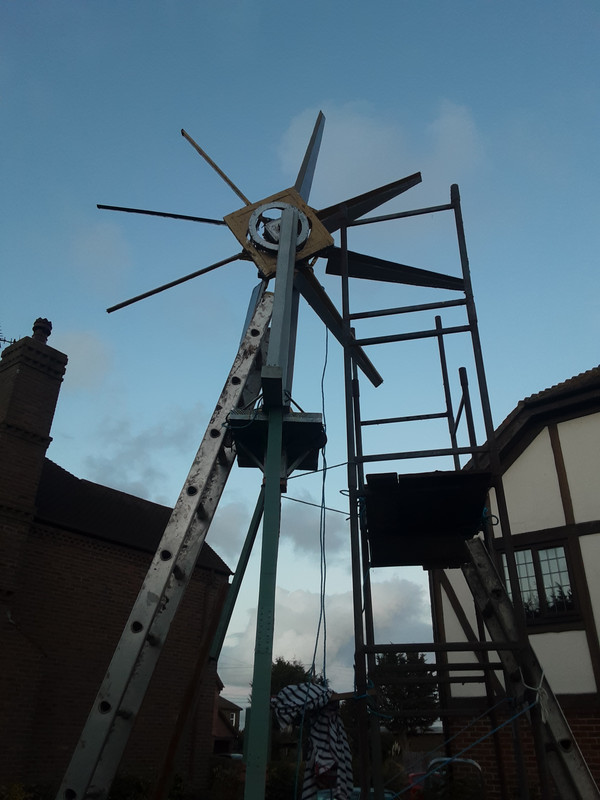
The rotor is heavier than last time and is proving to be an absolute pig to install. Trying to lift it is is hard enough. But lifting and manoevring the thing whilst standing on a 20' high platform makes it 10x harder. There is a lesson in there somewhere.
"Plan and prepare for every possibility, and you will never act. It is nobler to have courage as we stumble into half the things we fear than to analyse every possible obstacle and begin nothing. Great things are achieved by embracing great dangers."
Offline
Like button can go here
#45 2025-12-02 15:07:08
- SpaceNut
- Administrator
- From: New Hampshire
- Registered: 2004-07-22
- Posts: 30,736
Re: Misc. Home Projects
Must DYI windmills make use of a car hub/axle assembly attaching the blades to the disk. The complete assembly is easier to balance and mount in the end. Use one of the mount types that have the 4 holes for the mounting.
Offline
Like button can go here
#46 2025-12-03 07:03:44
- Calliban
- Member
- From: Northern England, UK
- Registered: 2019-08-18
- Posts: 4,305
Re: Misc. Home Projects
The rotor bearings are now in their cradle supports. There is still more to do before the windmill is operational. Whilst it has been a valuable learning exercise, I would certainly do things differently if I were to build another. This has been the toughest DIY project I have ever taken on. Everything is an order of magnitude more difficult when working at height.
"Plan and prepare for every possibility, and you will never act. It is nobler to have courage as we stumble into half the things we fear than to analyse every possible obstacle and begin nothing. Great things are achieved by embracing great dangers."
Offline
Like button can go here
#47 2025-12-03 15:13:50
- SpaceNut
- Administrator
- From: New Hampshire
- Registered: 2004-07-22
- Posts: 30,736
Re: Misc. Home Projects
I know how it feels being on my homes roof that is 16 ft off the ground.
Offline
Like button can go here
#48 2025-12-04 03:39:01
- Calliban
- Member
- From: Northern England, UK
- Registered: 2019-08-18
- Posts: 4,305
Re: Misc. Home Projects
I would probably build a much simpler vertical axis machine were I to do it again. Efficiency is lower, but the ease of construction and assembly make it more practical overall. Above all else, the design needs to minimise the need for working at height. If there is a rotor that needs maintenance or adjustment, then there needs to be a capability of lowering it down the pole for work, without having to work at height. Working at height means putting up scaffold and introduces problems of working in confined space, confined angle and having to avoid vibration. It slows things down dramatically.
One important thing I have learned is that the best solution is very dependant on local conditions. Midwest farms on flat land with a consistant wind direction, are well suited to the jumbo type ground mounted wind machines. Locations with variable wind directions are better suited to vertical axis designs that can make use of wind from any direction. Locations with a cluttered near surface environment need towers to overcome surface attenuation. If there is limited space, a horizontal axis machine offers greater efficiency. Local geography can sometimes be used to focus the wind. The availability of materials will have an impact as well.
Last edited by Calliban (2025-12-04 03:54:21)
"Plan and prepare for every possibility, and you will never act. It is nobler to have courage as we stumble into half the things we fear than to analyse every possible obstacle and begin nothing. Great things are achieved by embracing great dangers."
Offline
Like button can go here
#49 2025-12-08 07:39:30
- Calliban
- Member
- From: Northern England, UK
- Registered: 2019-08-18
- Posts: 4,305
Re: Misc. Home Projects
The rotor is turning now.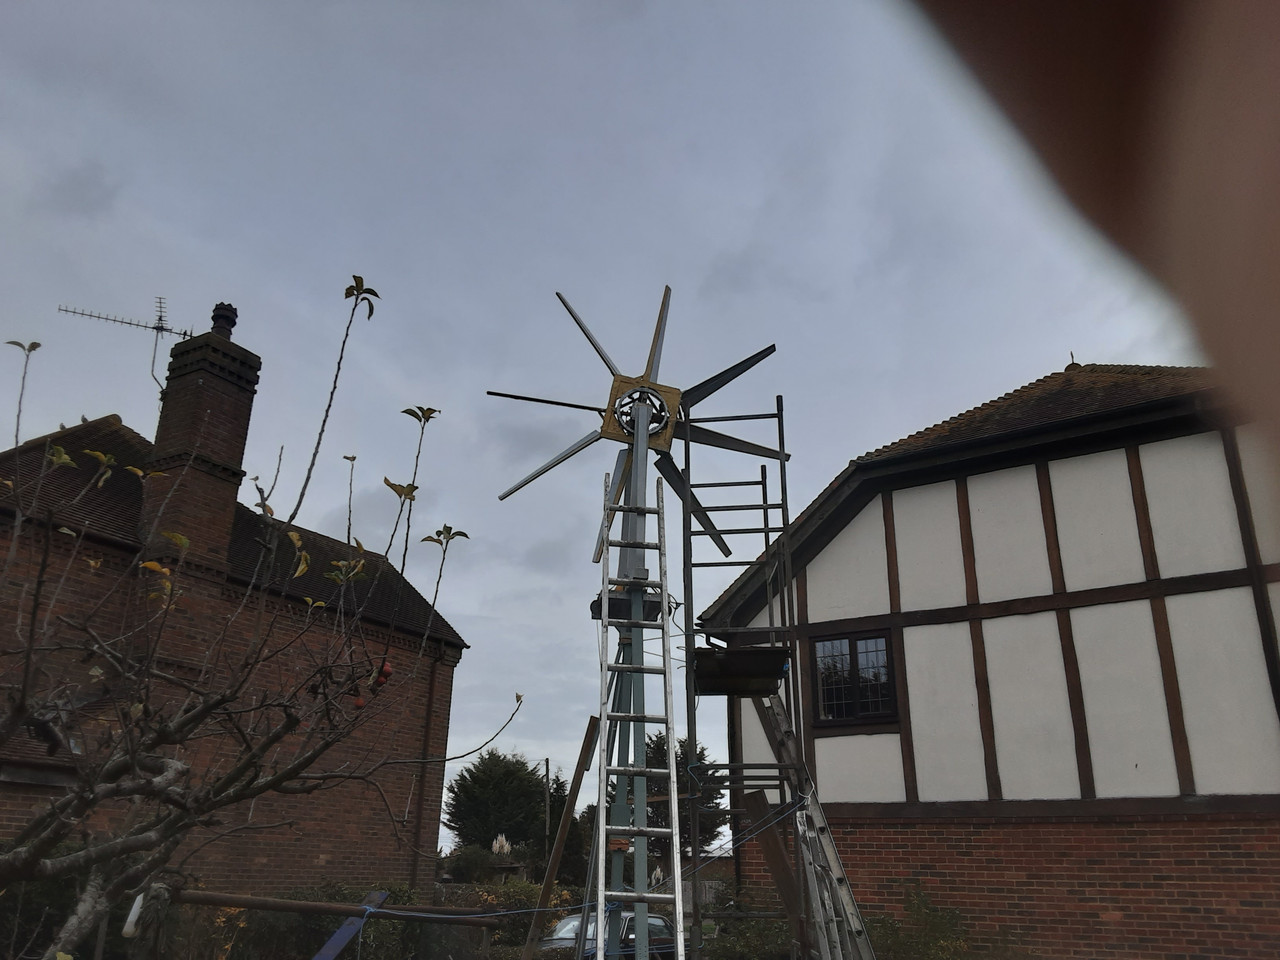
There remains much to do. The rotor must be balanced, the bearing caps must be installed and any damaged surfaces must be painted. Finally, the rope drive must be installed. This is going to take a while. I would like to finish by next sunday. I will see how it goes.
Last edited by Calliban (2025-12-08 07:41:21)
"Plan and prepare for every possibility, and you will never act. It is nobler to have courage as we stumble into half the things we fear than to analyse every possible obstacle and begin nothing. Great things are achieved by embracing great dangers."
Offline
Like button can go here
#50 2025-12-08 16:38:49
- SpaceNut
- Administrator
- From: New Hampshire
- Registered: 2004-07-22
- Posts: 30,736
Re: Misc. Home Projects
This design can be built Horizontal or vertical in form https://www.instructables.com/55-Gallon-Drum-Turbine/
Offline
Like button can go here